Add a pin terminal
In this tutorial we'll describe how you are able to add a PIN Terminal to our POS (Point Of Sale).
Pre-requirements
For this tutorial it's good to have an understanding how our App Store works. If not, you can read the documentation here or follow our tutorial for Laravel or Vue JS.
Create an app
Go to the Appstore and create an app. These are the requirements:
- Your app needs a webhook with the event payment.request
- The category needs to be
payment_provider - It needs a logo and a description
- You need all the scopes for the devices API.
Setup a device
We can use the devices API to setup an new pin terminal device. This can be found here: devices API
Add a new device with the following required parameters.
{
    name: 'Terminal Reception',
    type: 'pin_terminal'
}
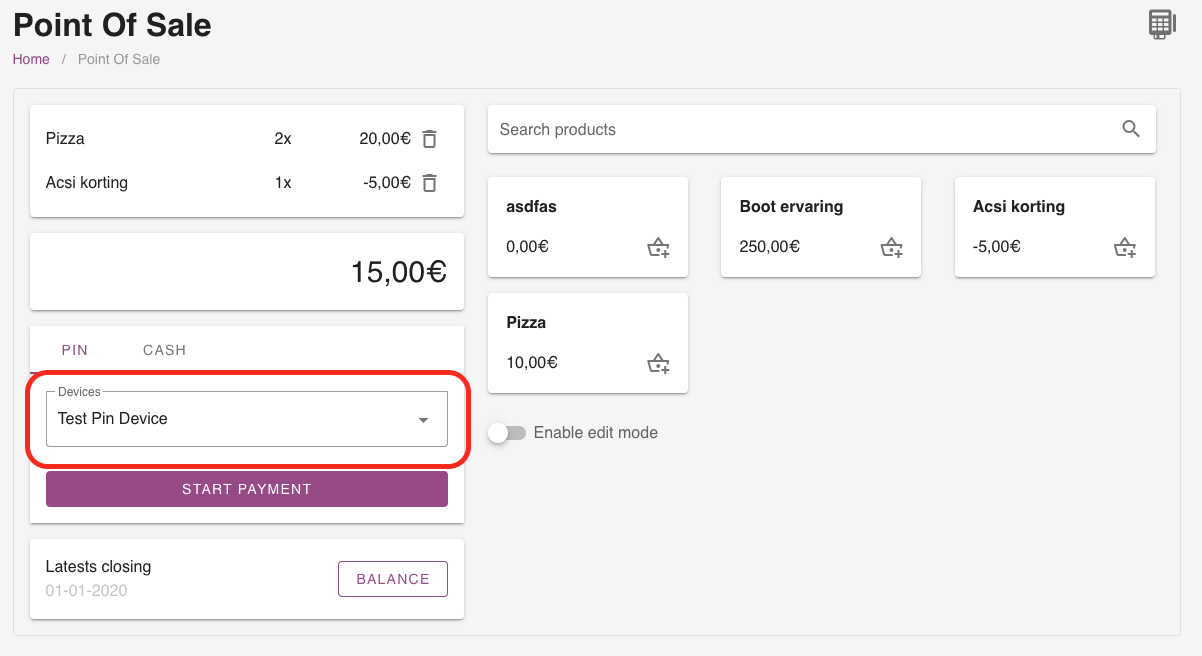
Once you have added the device with the type pin_terminal, it will also be listed in the terminal list in the POS application.
You need to add some meta keys, like the payment_endpoint or cancellation_request, this is possible with device meta.
{
    key: "payment_endpoint",
    value: "https://your-app-url.com/payment-request"
}
{
    key: "payment_timeout", // (Optional)
    value: 120
}
{
    key: "cancellation_request", // (Optional)
    value: "https://your-app-url.com/cancellation-request"
}
Payment flow
We have set-up a default payment flow. Once the payment is initiated from our software, we create a new payment. This payment has the status pending.
1. Payment request (POST)
When the user initiates the payment, we will send the following request to the payment_endpoint you have defined in your device.
{
    id: 123456,
    payment_uid: "pay_dfngjdnfg........."
}
Retrieve data
With the get payment endpoint. You can retrieve all the data from this payment. Like the currency and amount.
Success
1. Update payment status
Update payment status to locked or open. When the payment is open the user can manual delete it. When it's locked, the user is unable to delete the payment. (Locked is advised)
2. Return the success
When the payment was a success, return the following json message.
{
    result: "success"
}
Error
When anything went wrong, send the following json message back and describe your error message.
{
    error:
    {
        message: "Clarify what is going wrong in an error message.",
        code: 123 // (Optional) status code
    }
}
Timeout
The default timeout is 120 seconds. But you can change this by changing the timeout parameters in your device. The maximum timeout you can set is 300 seconds.
Automatic cancellation
When, for whatever reason the payment is still pending after 300 seconds. We will delete the payment automatically. The pending status will change to deleted.
2. Cancellation request (POST)
This request is optional. If you don't support the cancellation feature. You can leave the cancellation_request endpoint in the device meta empty.
{
    id: 123456,
    payment_uid: "pay_dfngjdnfg........."
}
Success
When the payment was a success, return the following json message.
{
    result: "success",
}
Error
When anything went wrong, send the following JSON message back and describe your error message.
{
    error:
    {
        message: "Clarify what is going wrong in an error message.",
        code: 123 // (Optional) status code
    }
}